Showing posts with label cheap sides. Show all posts

Garlic and Herb Potato Wedges


So, I LOVE french fries. It's gotten to the point where I have to eat only at Mexican restaurants to avoid these grease-heavy jewels, because they are everywhere. I'm starting to suspect that substituting them with deep fried tortillas isn't helping my case.

Regardless.

Tim asked me to make him fries to go with his cheeseburger, and it's been ions since I've made these. I don't think I've ever blogged them, either *any of my readers are welcome to correct the latter statement*. They're like that one thing that you've made out to be so big in your mind that you avoid it like the plague, for...well...ever.

Turns out I was making a huge deal out of nothing again.


These are effortlessly so divine. I love Arby's, but I think these blow their potato wedges out of the water. I hope you enjoy them as much as we did!

Ingredients (for 2):
  • 4 medium red potatoes
  • 3 tablespoons olive oil
  • Garlic salt
  • Freshly ground pepper
  • Dried seasonings (oregano, parsley, basil, etc.)
Directions:
  • Wash and pat dry potatoes
  • Preheat oven to 425 degrees F
  • Cut into 1/8th's
  • Pour olive oil into a bowl. Place all sliced potatoes into the bowl and, using your hands, gently toss with oil.
  • Place on a baking sheet. Top with salt, pepper and seasonings
  • Bake about 45 minutes, flipping about 30 minutes through. But like I always say, keep an eye on them. Every oven is different, and some will cook quicker than others.
Love and wedges,

-->

Sweet Potato Fries (Baked)


I ain't Southern. We've talked about this. It's pretty old news. In fact, I'm going back to the homeland (California) this weekend! I'm going to walk my dog, my mom's going to braid my hair, and my dad's going to take me to Rodeo Drive and buy me diamonds.

Which of those two things are true? Actually, only the middle one is true. Max walks me.


I wuv him.

Anyway, I finally broke down and made sweet potato fries. I was completely against this new fad-fries are not supposed to be sweet. They are supposed to be salty, deep fried, and dipped in highly-processed ketchup. God bless 'merica.

Regardless, Tim has always been a big fan. And if you haven't noticed, I haven't been around much. That's because I haven't been cooking much, and poor Tim has been begging me for a decent meal.

And this is it.

Ingredients (serves 2):
  • 2 large sweet potatoes, peeled
  • Olive oil
  • Fresh sea salt
  • Fresh ground pepper
  • Garlic salt
  • Corn starch
Directions:
  • Cut off both ends of both potatoes (the pointier part).
  • Cut into fry-shaped cubes. I didn't do steak fries, but used the typical fast food fry shape as my example. But really, no one cares that much what they look like.
  • Soak in ice cold water for a few hours. This helps release the starch, and gives your fries a better chance of being crispy.
  • After soaking, preheat oven to 450 degrees.
  • In a large bag, combine sea salt, pepper, garlic salt and corn starch. There's no set measurements for this; just enough to lightly coat the potatoes. I will say, though, that the corn starch is supposed to be the main character.
  • Throw the potatoes in the bag, seal and shake.
  • Place on baking sheet, spacing generously. If they're touching, or if there are too many in one batch, they'll steam and they won't be crispy.
  • Drizzle olive oil over all fries. I put about 1/8 teaspoon (est.) on each fry and then brushed it lightly with a basting brush to ensure it was evenly coated.
  • Baked at 450 for about 20-25 minutes. Try not to open the oven, but keep the oven light on so you can see the fries and keep an eye on them.
  • After the top looks generally crispy, take them out and using a spatula, flip them.
  • Bake for another 15 minutes (or so). Fries should be crispy but not burnt.
I made these with grilled chicken nuggets. Just chop up a chicken breast, season with salt and pepper, and throw them on the George Foreman until cooked thoroughly. Serve with honey mustard.

Love and bein' Southern, y'all,

-->

Red Lobster Cheese Biscuits


Truth: I eat no sea food. At all. No, not even crab cakes or clam chowder. The thought of eating a fish or anything originating from the ocean disgusts me. And yes, I am completely comfortable eating a cow or a pig. I'm a mystery.

Another truth: I have never stepped foot into a Red Lobster.

Okay, last truth: Not once in my life have I tasted the famous Red Lobster cheese biscuits. So to be truthful, I don't know if this came even close. But I know someone who does...

Years ago, when my husband was in middle school, he and his classmates visited the museum at Bob Jones University here in Greenville, South Carolina. Being the sophisticated and polished young man that he was, he wore his favorite AC/DC shirt underneath his collared shirt. Unfortunately, as he was gazing upon some renown painting, he got a little warm. So what do you think he did?

Of course. He took his shirt off, revealing Angus Young and his buds. What happened next doesn't surprise me: he was kicked out; left on the streets to fend for himself. This is before protocol and liability. It was the 90's.

Poor Tim found himself stranded at a Red Lobster across the street without a dime to his name. Some waitress took pity on him and gave him all the cheese biscuits and coke he could handle.

All this to say, I may not have any great expertise in Red Lobster cheese biscuits, but the man eating next to me does. And he claims that these.were.INCREDIBLE. I would certainly hope so-he's eaten four.

I rest my case.


Ingredients:
  • 1 1/2 cups bisquick or biscuit mix
  • 1 1/2 cups shredded cheddar cheese
  • 1/2 cup milk
  • 2 tbsp butter
  • 1 tbsp oregano
  • 1/2 tbsp garlic salt

Directions:
  • Preheat oven to 400 degrees.
  • Mix bisquick, shredded cheese and milk in a bowl.
  • Place tablespoon-fulls of mixture on baking sheet.
  • Bake for 10-12 minutes.
  • While that's baking, melt the butter in a bowl and stir in oregano and garlic salt.
  • Remove biscuits from the oven and brush butter mixture over them.
  • Bake another 5-7 minutes.
  • Serve warm.

Okay, I will admit, if I were one to eat clam chowder or another fishy soup, this would be tasty with it. It would also compliment potato or broccoli soup. Or tacos. Or your Friday night pizza. Anything, really.

They're divine.

Love and cooking-blind,

-->

Grandma Boomer's Baked Beans

My great grandma Boomer was a peculiar woman. Granted, I only knew her when she was over the age of 90 years old, but what I experienced, I will never forget. a) She slept during the day and stayed up all night. b) She would watch you sleep. c) She hid under the couch for no apparent reason. d) She would give you valuable items that you shouldn't be given. I believe she gave me a few pieces of very expensive jewelry that had been set aside in her will for some other family member, and I had to give it back when she was hiding under the couch.

Now, I don't mean to give Grandma Boomer a bad rap. As I mentioned, she was old. And when you get to be a certain age, I don't think you owe anyone an explanation, really. Just ask my dad.

GOTCHA, DAD!

Kidding. My dad is only 35.

Patrick, me and Grandma Boomer, back in the day

But Grandma had the simplest, most delicious baked beans you've ever eaten. My mom hides these things from me, and then **BAMM,** she hits you out of nowhere with this long-lost, secret family recipe. She's full of surprises. Must be the Boomer gene.

Ingredients:

  • 2 large cans of baked beans
  • 1 package of uncooked bacon, cut into bite-sized pieces
  • 1 box of dark brown sugar
  • 1 bottle of ketchup
  • 1 yellow onion, chopped finely
Directions:
  • Spray a 13x9 pan with Pam
  • Combine all ingredients and toss into the pan
  • Bake at 325 degrees for hours 
Did I mention Grandma was a minimalist? If it was quick, filling and tasty, it was on her table. Not that I would know. She was too busy hiding under the couch to cook for me.

Love and a-little-nutty-in-every-family,
Rachael

Grandma's Green Beans

Okay, confession. Neither one of my grandmas ever made these for me. This isn't even their recipe; however, I justify the name because I will make these for my grandchildren one day. Granted, about 2,593,829 things have to happen for me to be in that position, but a girl can dream, right?

Right.

My friend, Rebekkah, is the queen of green beans. Actually, she's the queen of vegetables. Period. She can take that old moldy tomato at the bottom of the pile and turn it into something mouth-watering. She always tells me, "If you don't like the taste of vegetables, you aren't cooking them right."

Interesting concept, right?

So I decided to make my vegetables tasty. And let me tell you what ... if I could make all my veggies taste like these green beans — buttery and sweet and salty — I'd never have to eat a french fry again.

WAIT. No. I didn't mean that. That was a false statement. Let the record show, I enjoy french fries ....

... and "Grandma's" green beans.

Ingredients:
  • 1 lb. fresh green beans
  • 1 tbsp. butter
  • 2 tbsp. live oil
  • Minced garlic (about 4 cloves)
  • Salt and pepper
  • 1 tsp. brown sugar
Directions:
  •  First, cut off all the ends of the green beans and rinse them. Discard the ends.
  • Warm up about 2 tablespoons of olive oil over medium heat.
  • Add the green beans and the garlic. Turn heat on medium low and cover.
  • Stir every 5 minutes or so, making sure they don't burn. If needed, turn it down to a lower heat. We want them to cook slowly and almost marinate in the olive oil and garlic as they cook.
  • After about 15-20 minutes, add a tablespoon of butter to the pan and move around until melted. If you're brave and feel like it, add more butter. Life is short (although more butter might make it shorter).
  • Cover again and let cook over low heat for about 10 minutes. Once again, keep an eye on it.
  • Add salt, pepper and 1 teaspoon of the brown sugar. Mix thoroughly.
  • Serve as a side dish
    • We want these green beans to be just the right consistency, and this timeline is what worked best for me. We don't want them soggy, but we definitely want them softer and not raw and crispy (unless that's your thing). Every pan and stove heating is different, so it's important to just keep an eye on it, allow it to stay at a low heat, and stir every few minutes until they're at your desired consistency.
The beauty about green beans is that they're versatile. They go great with steaks, chicken, pork, or fish. Personally, I love serving these to Tim with a big juicy steak and a loaded baked potato. Now doesn't that just sound amazing?

Love and cooking-veggies-the-right-way,
Rachael
-->

Puree salsa

I work in an office that has an ice cream chest. Yes, I said it. A chest full of ice cream; unlimited to those of us who have dedicated our lives (or at least 40 hours a week) to The Journal. This shouldn't come as a surprise to you, as our office revolves around food. I have a feeling I'll be losing a few pounds once I leave this place of temptation next week.

My friend, Jessica, recently brought in some incredible salsa for us to try. Now, I love Mexican food, but it's hard for me to find salsa that I just absolutely love. I'm not a huge fan of all the big chunks of tomatoes and onions. Have I ever told you about how my baby brother used to throw up whenever you said the word "tomato?" No? Another story for another time.

So I begged and pleaded, and Jessica was kind enough to share her recipe. It was incredibly fresh, tasty, and full of all-natural ingredients that are easy to find during the summer.

Ingredients:
  • 3 tomatoes
  • 1 onion 
  • 2-4 cloves of peeled/minced garlic
  • Juice of 1 lime
  • 1 jalapeño 
  • 1 good handfuls of fresh cilantro
Directions:
  • Cut your tomato's and onion into big chunks and remove seeds
  • Slice open the jalapeño pepper and remove the stem and seeds. Set the seeds aside, (that's where all the heat is)
  • Combine all ingredients in a food processor and blend till desired texture
  • Add salt and pepper to taste
  • If you like more heat add the pepper seeds and blend again
  • Let chill in refrigerator before serving
Enjoy!

Love,
Rachael

Hot corn dip

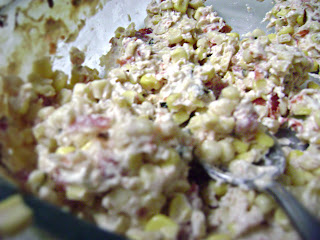
I accidentally came across this peculiar dip at a friend's wedding last year. I was extremely hesitant to try it because of the tomatoes (just being honest), but after hours in a bridesmaids dress, I was ready to dive into just about anything. This dip is colorful, spicy, perfectly creamy and is an amazing side dish at a summer barbecue. Plus, it's super quick. And cheap.

Ingredients:
  • 1 can white corn, drained
  • 1 can yellow corn, drained
  • 1 can diced tomatoes with green chile peppers, drained
  •  1 package cream cheese, diced
    • Make sure it's softened
  • 1/2 teaspoon chili powder
  • 1/2 teaspoon garlic powder
  • Chopped cilantro
    • Don't skip this ingredient!
Directions
  • Preheat oven to 350 degrees
  •  In a medium baking dish, mix white corn, yellow corn, diced tomatoes with green chile peppers
  • Add cream cheese dices, chili powder, garlic powder and cilantro. Combine thoroughly.
  • Bake for 30 minutes or until hot 'n bubbly 
  • Serve with tortilla chips
    • The ones with the hint of lime go great with this dip
Pinky promise, your guests will L-O-V-E this.


Love and chips-'n-dip,
Rachael

Spanish rice


What is it about Mexican food? I'm positive that at some town hall meeting hundreds of years ago, some Latino genius stood up and said, "Let's add cheese to everything we make and fry everything — including our desserts — in order to fatten up the general population."

God bless 'em.

I occasionally meet my friend, Kylie, for lunch at our neighborhood cheap-yet-divinely-amazing Mexican restaurant for lunch. I thought I had life figured out with my chicken enchiladas and beans, but she has made me do a complete 180 in my obsession. I'm now wholly devoted to chicken quesadillas and Spanish rice. So it was only natural that I should end up traipsing around my kitchen, tirelessly attempting to recreate this new favorite of mine. I won't lie to you and say that this is as satisfying as the lard-filled rice you'll get at a restaurant, but this is really dang good, and it's really dang quick.

Ingredients:
  • 1 1/2 cups rice
  • 2 1/2 cups chicken broth
  • 15 oz can plain tomato sauce
  • 3 cloves finely chopped garlic
  • 1/3 cup chopped onion medium onion
  • 2 tablespoons oil
Directions:
  • In a medium sauce pan, heat oil over medium heat. 
  • Add the chopped garlic and onion. Saute for 1-2 minutes. 
  • Add in uncooked rice. Stir for about 5 minutes until rice becomes a golden brown color.
  • Add in broth and tomato sauce
  • Stir for about 5 minutes and bring to a boil. Once it starts boiling, turn the heat to low and cover.
  • Let simmer for 20 minutes, then fluff with a fork. 
That's it! Only about 10 minutes of prep time, and your stove does the rest.

Love and Spanish history lessons,

Cheesy scalloped potatoes

I just have to have easy recipe options. I have to. I spend 35% of my day sleeping, another 35% of my day in a cubicle, and the last 30% is filled with laundry, cleaning, making lunches, packing lunches, and dancing around my apartment when Tim's not around.

A girl's gotta' dance, right, ladies?

And then there's the whole Monday debacle. You know how I feel about this day. Typically, I pull out my most effortless recipes on Mondays and Fridays, the two days that I feel are void and meaningless. Actually, they're quite busy and fulfilling, but still, I wish they didn't exist.

This recipe is extremely versatile, and while there are a million different ways to make scalloped potatoes, I find this to be quick, effortless, and it can be made in a crock pot.

I think the angels just busted out in song.

So happy Monday, everyone. Or, for those of you who look on the bright side like me (not), happy sucky no-funday.

Let's just get through today, okay, kids?

Ingredients:
  • 8 oz. bag of shredded cheddar cheese
  • 1/3 cup butter
  • 1/4 cup flour
  • 2 cups milk
  • Garlic salt, salt and pepper
  • 5 medium potatoes
    • I use red potatoes, which tend to run small, so sometimes I use 6.
  • 1/3 cup diced onions
Directions:
  • Peel and slice potatoes 
    • Make sure the potatoes aren't sliced too thick, because that can add a lof of extra cooking time
  • Boil a pot of water and add the potato slices. Let them sit in the water for about 10 minutes (no longer than 15)
    • By softening the potato slices, it minimizes cooking time
  • While the potatoes are softening, melt the butter over low heat
  • Add the chopped onions and let them simmer over low heat for a few minutes
  • Add the milk and flour
  • Stir with a whisk until all the chunks of flour are broken down
  • Add the cheese and turn the heat up to medium. Let it melt gradually, which could take about 10 minutes.
  • Add a dash of salt, pepper, and garlic salt
  • Drain the potatoes
  • Pour half the cheese sauce into a 2 1/2 quart baking dish
    • If you plan on using a crock pot, pour the cheese into the bottom of that and continue with instructions.
  • Pour all the potato slices on top of the cheese sauce
  • Top with the rest of the cheese sauce
  • Bake at 350 F for about an hour
    • When using a crock pot, cook on low for 4-5 hours or on high for 2-3 hours. This isn't one of those recipes that you can leave in all day. 
If you're anything like me, you automatically shy away from any recipe that has more than five or six instructions, but once you've done this once, you've mastered it. Like I said, there are so many ways to prepare this side dish, but this particular recipe is very much a "comfort food." My husband told me that it reminded him of macaroni and cheese, just with potatoes.

And that's what I call a success.

Love and comfort,
Rachael
Content Copyright © 2009 by Rachael Wadsworth and All Kinds of Yumm. All rights reserved. Click here to read our Privacy Policy. Click here to read our Cookies Policy.