Showing posts with label Pizza. Show all posts

Puff Pizza


I met a sweet older lady at church last Sunday who said she was as huge fan of All Kinds of Yumm. We started talking about what we were doing that weekend, and she suddenly said, "I bet all you'll be doing is cooking since you love to do it so much!"

Oh, bless her heart.

I gently explained to her that while cooking isn't something that I dread, it's definitely not something that I wake up dying to do. I don't prance around the kitchen, singing and twirling. Oh, no. My goal is to get in, get it done, get out and get back to my book. Especially on a Saturday night.


Saturday night=pizza fun. Pizza fun=the fastest, easiest pizza recipe I can find. This=the fastest, easiest pizza recipe I could find. And quite frankly, it tastes delightful, as my husband claims.

Apparently puff pizza is quite the rage right now. I've even heard of puff enchiladas, which I plan on thoroughly researching. But in the meantime, I hope you enjoy this recipe. Because after all, it is Saturday night, and you probably don't feel like cooking.

Ingredients:
15 oz. can jumbo biscuits
1 jar pizza sauce
Shredded mozzarella cheese
Shredded cheddar cheese
Parmesan cheese (I just used the powder kind)
Pepperoni or other toppings (other toppings may include ground beef, bacon, and vegetables)
Italian seasoning
Garlic salt

Directions:


First, we grab our biscuits.


Cut each biscuit into quarters.


Arrange them in a 13x9 pan. I know it may seem strange that they're so far apart, but as the biscuits expand, it'll fill the whole pan.


Add pizza sauce and combine well so that biscuits are coated.


Sprinkle with cheddar cheese and pepperoni.


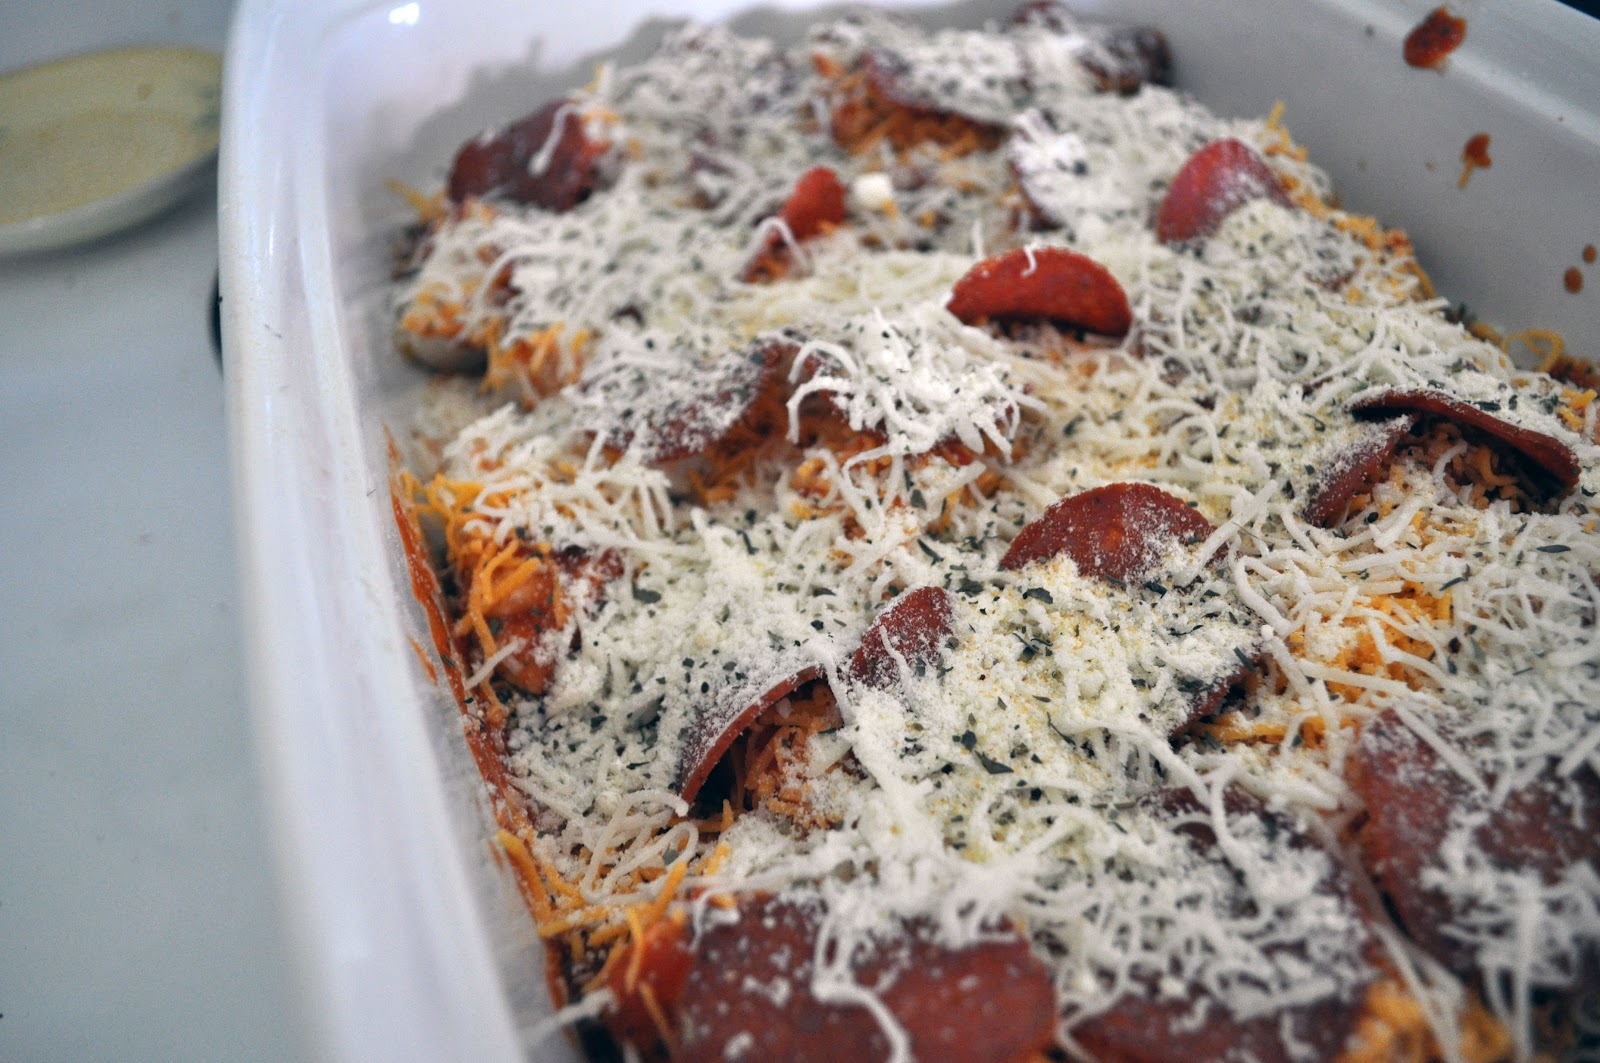
Top with mozzarella cheese, Parmesan cheese, Italian seasoning and garlic salt.


Bake at 350 for 20-30 minutes.


Oh baby.

Happy Saturday.

Love and puff,

Pizza Roll

If there's one thing I've learned in the world of cooking, it's that minor changes can appease the masses. My husband, for example, often complains about how often we have homemade pizza.

Can you ever have too much homemade pizza? Puh-lease.

Apparently so. There is really absolutely no reason to make your pizza this way. It just looks looks cool, and quite frankly, you get away with eating much more pizza than if it was prepared the traditional way. And I'm all for more pizza, let me tell you.

Ingredients:

  • Fresh pizza dough
  • Pizza sauce
  • Italian seasoning
  • Garlic salt
  • Olive oil
  • Pepperoni
  • Shredded mozzarella cheese
Directions:
  • Roll out the dough in as square-of-a-shape as you can.
  • Spread out a thin layer of pizza sauce. Too much and your dough will break.
  • Layer with several pepperonis. This is not the time to be worried about quantity. Lay it on there thick.

  • Generously spread out mozzarella cheese.

  • Sprinkle with Italian seasoning and garlic salt.

  • Roll it up! Do this very slowly and carefully.

  • Brush olive oil on top of the "roll" and put in the oven at 350 degrees for 30-50 minutes.
    • I know people probably get sick of hearing me say this, but I really hesitate to give a specific time for cooking. Every oven and pan are different, so just make sure that the top of this is golden brown and all the dough is cooked thoroughly.
It's that easy, folks! I've also seen people make this without sauce and put the sauce in a different container to dip this in. It's almost more of an appetizer than an actual meal. I won't say I'll make it like this every time, but it was definitely fun and different.

Love and variations,
Rachael

Sourdough Pizza Crust


I've found that very few things satisfy like homemade pizza. It fits all moods: rainy, sunny, happy, depressed...there is never a situation in which pizza is not appropriate. Now, before you succumb to Domino's takeout menu, let me explain why this is better.

First, there's the obvious satisfaction that comes with preparing something from scratch. But you don't care about that, do you? Me, neither; however, what I do care about is the taste. And this sourdough crust...this sourdough crust...I'm in tears. It's tangy and delicious and it brings a whole new life to pizza. I will never regret trying this.

I've taken this recipe from King Arthur's website, because I'm scientifically challenged and don't understand much, including the complexity of sourdough. They've held my hand through this entire thing.

And there are plenty of hands to go around.

Ingredients:
    •    1 cup sourdough starter, unfed (straight from the fridge)
    •    1/2 cup hot tap water
    •    2 1/2 cups King Arthur Unbleached All-Purpose Flour
    •    1 teaspoon salt
    •    1/2 teaspoon instant yeast
    •    4 teaspoons Pizza Dough Flavor, optional but delicious

Directions
  •  Stir any liquid into the sourdough starter, and spoon 1 cup starter into a mixing bowl.
  • Add the hot water, flour, salt, yeast, and Pizza Dough Flavor. Mix to combine, then knead till smooth and slightly sticky, about 7 minutes at medium speed using a stand mixer with dough hook. Place the kneaded dough in a lightly greased container, and allow it to rise till it's just about doubled in bulk. This might take 2 to 4 hours; it might take more. A lot depends on how vigorous your starter is. For a faster rise, place the dough somewhere warm (or increase the yeast). To slow it down, put it somewhere cool.
  • For two thinner-crust pizzas, divide the dough in half, shaping each half into a flattened disk. Drizzle two 12" round pizza pans with olive oil, tilting the pans to coat the bottom. Place half the dough in each pan. Cover, and let rest for 15 minutes. Gently press the dough towards the edges of the pans; when it starts to shrink back, cover it, and let it rest again, for about 15 minutes. Finish pressing the dough to the edges of the pans.
  • For a thicker-crust pizza, drizzle olive oil into a jelly roll pan (10" x 15") or half-sheet pan (18" x 13"), or similar sized pan; or a 14" round pizza pan, tilting the pan to coat with the oil. Shape the dough into a flattened disk or oval. Place it in the pan, cover it, and let it rest for 15 minutes. Push the dough towards the edges of the pan; when it starts to fight back, cover it and let it rest for 15 minutes. Finish pushing it to the edges of the pan.
  • Cover the pan, and let the dough rise till it's as thick as you like. For thin-crust pizza made from fairly fresh starter, this may only be an hour or so. For thick-crust, using an old, little-used starter, this may take most of the day. There are no hard-and-fast rules here; it all depends on the vigor of your starter, and how you like your crust. Once you make it a couple of times, you'll figure out what time frame works for you.
  • Towards the end of the rising time, preheat your oven to 450°F.
  • For a thicker crust, pre-bake the crust for about 8 minutes before topping. Top, then bake till toppings are hot and cheese is melted and bubbly, about 10 minutes. For thin crusts, bake for 4 to 5 minutes, then top and bake for an additional 8 to 10 minutes, or till toppings are as done as you like.
  • Remove from the oven, and loosen the edges of the pizza with a table knife or heatproof spatula. Carefully lift it onto a cooling rack; you can serve it right from the pan, if desired, but a cooling rack helps keep its bottom crisp. Serve hot.
    • Yield: one 14" round, or rectangular thick-crust pizza; or two 12" round thin-crust pizzas.
    • Be aware of some sourdough dynamics here. The less-used your starter, the more liquid on top, the more sour it's likely to be; using a starter that hasn't been fed for weeks will yield a pizza crust that rises slowly, and tastes quite tangy. This type of crust is handy when you want to make dough in the morning, and have pizza ready for dinner. On the other hand, a starter that's fed regularly will yield a less-sour crust, one that will rise much more quickly. This is a great "weekend" crust, as you can shape it at 8 a.m., and have pizza for lunch.
Love and pizza...because it's just that good,

-->

White Pizza


Homemade pizzas have always been a favorite around here, especially on Sunday afternoon. When Tim and I come home from church, we throw on our sweats, throw together some version of a homemade pizza, toss a salad, and enjoy a few minutes of peace and quite before another crazy week. And if I'm feeling really crazy, I'll chill a few glasses and drink some diet root beer. Don't worry, though, I don't make a habit of it.

The real challenge is in mixing it up. We typically stick with either the three meat pizza or a traditional pepperoni pizza. If I have time, I made the pizza dough ahead of time; otherwise, I just buy the pre-made pizza crusts. And let me tell you, even though it's more expensive than the off brand, Boboli pizza crusts are the best I've had.

And let me tell you, I have eaten a lot of pizza in my lifetime.

So there's this restaurant called Olympian Grill in Greenville, and it's a Wadsworth hotspot. Matt and Stef, my brother and sister-in-law, always order a white pizza, but having an extremely limited palette, I never actually tried it. So I did some research, a lot of googling, and asked around to all the white-pizza-loving people in my life. I realize there are many different variations, but this one is extremely fast and only requires five ingredients.

Ingredients:
  • Garlic flavored olive oil 
  • Pizza dough 
    • This can be homemade, pre-cooked store bought, or raw store bought. Whatever works for you. I'm using a Boboli pre-cooked pizza crust to save time. 
  • 3 cups shredded mozzarella cheese 
  • Ricotta cheese 
  • Oregano
  • Salt and pepper

Directions:
  • Sprinkle some olive oil onto a pizza pan (unless you're using a stone, which would make this step unnecessary) 
  • Set the pizza dough/crust on the pan 
  • Top with more olive oil. Don't flood it, but be generous. It adds a great deal to the flavor and makes it nice and crispy. 
  • Cover with shredded mozzarella 
  • Add about 5-6 dollops of ricotta cheese throughout the pizza
    • Do not spread the ricotta cheese out. It's supposed to be big spoonfuls all over the place, and it will set and spread as it cooks.
  • Top with a little bit of oregano, and add a pinch of salt and pepper 
  • Bake at 400F for about 10-12 minutes if you have a pre-made crust. If you're using raw dough, bake about 25 minutes.
Remember, weekends should be effortless, and this pizza is exactly that.

Love,

-->

Mexican Pizza


I'm not afraid to admit that I have an addiction to Taco Bell. The whole "is this real beef" debacle doesn't stop me from hitting up their drive thru when I'm having one of "those" days.

Well, it's been a good day, but I still could use some Taco Bell in my life, just without the drive thru or the 45-year-old employee who calls me "sweetie" and tells me I have pretty eye lashes. Which, I mean, whatever; I like a good compliment. I just tend to get them from strange people.

Anyway, so keeping in tune with my Mexican-themed food week (aka, the Spanish rice I made the other day), I thought this would be perfect.


Ingredients:

  • 2/3 cup mild salsa or Taco Bell taco sauce (which is the absolute best)
  • 1/2 lb. ground beef
  • Taco Bell Taco Seasoning
  • 4 small flour tortillas
  • 1 cup oil for frying
  • 1 cup warmed refried beans
  • 1 cup shredded cheddar/Monterey Jack cheese blend
  • 1/4 cup chopped tomatoes (optional)
  • 1/4 cup chopped green onions (optional)


Directions:

  • Cook ground beef over stove and add taco seasoning.  
  • Brown meat over medium high heat. Set aside after cooking.
  • Pour the oil in a shallow skillet and turn on high heat.
  • Fry tortillas for 30-45 seconds per side, keeping as flat as possible
  • You'll have to pop all the bubbles in the tortilla
  • Pat dry with paper towel
  • Warm up refried beans in the microwave, then spread them on one of the fried tortillas.
  • Add meat, then salsa/taco sauce to the top of the tortilla
  • Top with a second fried tortilla
  • Sprinkle cheese, tomatoes and onions on top of second tortilla.
  • Place the pizza in the oven at 225F or in a broiler until the cheese is melted.
  • Serve topped with shredded lettuce, sour cream, and your other favorite toppings alongside

Spanish rice, tortilla chips and salsa.

This appeals to the Cuban heritage in me, as small as it might be. What can I say? Me encanta la pizza mexicana.


Love,
-->

3 Meat Pizza


Can we take just a second to talk about pizza? I know we've discussed that, as a semi-fat child, I loved Thursdays because they were pizza days at school. One thing I really love about pizza is its versatility with toppings, and if you haven't discovered pre-made pizza crust, you're missing out. If you have the time and inclination, go ahead and try this homemade crust that I used to make all the time. I had to stop making it because Tim got all upset and actually wanted me to talk to him and spend time with him after work.

Men are so needy.

Because of Tim's dietary restrictions, I use Boboli whole wheat pizza crust, but they have other types of crusts as well. Like I said, there are hundreds of different variations of pizza toppings out there, but this particular one was perfect for my meat-loving, "guy's guy" husband.

Ingredients:
  • Pizza crust
  • Mozzarella cheese
  • Cheddar cheese
  • Pepperoni (I use turkey pepperoni)
  • Deli ham (about 2 thick slices)
  • 5 small frozen meatballs
  • Pizza sauce
  • Italian seasoning

Directions: 
  • Preheat oven to 425 degrees
  • Place pizza crust on a stone or baking sheet
  • Spoon about 3 tablespoons of pizza sauce on the crust
  • Top with equal amounts mozzarella and cheddar cheese (as much as desired)
  • Cover with pepperoni
  • Microwave frozen meatballs and cut into 1/4ths. Cover pizza evenly.
  • Cut up deli ham into small pieces and place on pizza 
  • Add a small amount of both cheeses to "seal" the toppings to the crust.
  • Sprinkle Italian seasoning on top
  • Bake 15-20 minutes
  • Serve hot with salad
There are many times when I'm running behind and completely forget to cook Tim dinner. I timed myself this morning, and preparing this pizza took less than 5 minutes, and as long as you have someone able to work the oven, you can throw it in, set the timer and go.

On another note, I know a lot of you will say, "Why would I take the time to make a pizza when I can order one for about the same price it takes to cook one?" One of the things I've discovered that I love about cooking is that I know what's going into my food. I don't have to worry about how clean Little Caesar's is or what ingredients Papa John's is using. I know what's in my pizza, and I love that.

The end.

Love,

Pepperoni Calzone


Thursdays were always my favorite days growing up. Honestly, they still are. I have the whole weekend just within reach, and I always look forward to Friday, simply because I spend that entire day looking forward to the weekend.

It's complicated. I'm complicated.

But as an innocent, somewhat chunky child, Thursdays were my favorite days because it was pizza day at school. I am hesitant to admit this, but I was always the first in line.

Some things never change.

As an adult, I'm trying to stretch myself and become open to new things. I listen to classical music on occasion, watch the 700 club and read the paper (probably just because I want to impress my boss, the editor of the paper, and my night-editor who knows something about everything),

That's right...I'm talking to you, Amber.

Regardless of my tireless efforts, I cannot stray from my love of pizza, which is why tonight I am preparing its cousin, the calzone.

The beauty of calzones is that they're fancier-like pizza dressing up to go to the prom. Or, depending on how you look at it, it's a glorified hot pocket. You can fill them with whatever you want: chicken, veggies, sauces, etc. I am going forward with my traditional pizza calzone and will be using pizza sauce, cheese, olive oil, pepperoni, and italian herbs. Get creative, though! It's much easier than it looks.

Let's start with the dough. Instead of being repetitive, here's the link to my homemade pizza dough.Just make sure and stop before you start putting on toppings. Just make the super easy dough and then we'll pick up back here.

**As a side note on that pizza dough, this time I used whole wheat flour instead of white flour**
  • Roll the dough out into a round shape. It doesn't have to be perfect.
  • You're going to need to add the dough to whatever you're going to be baking it on. I used a stone and put a thin layer of corn starch on it.
  • Add the pizza sauce to half the dough. Make sure and keep it an inch from the edge.
  • Add mozzarella cheese.
  • Throw on some pepperoni. This is turkey pepperoni which, P.S., tastes exactly the same and is so much better for you.
  • Add more sauce.
  • Fold the other half over and pinch the sides together.
  • Bake at 400 for about 20 minutes.

VoilĂ ! There ya' go, people. Eat and enjoy!

Xoxoxoxo,
Rachael
Content Copyright © 2009 by Rachael Wadsworth and All Kinds of Yumm. All rights reserved. Click here to read our Privacy Policy. Click here to read our Cookies Policy.