Showing posts with label Dessert. Show all posts

Frozen Peanut Butter & Dark Chocolate Banana Bites


You know those moms who serve fruit for dessert? That's not me. If I get a single grape into my kid over the span of a week, I feel like a freaking ninja. Literally, I am always trying to figure out ways to trick my family into eating healthy snacks. I'm really excited about these peanut butter and dark chocolate banana bites because they mean I can finally-and honestly-tell people that I serve my toddler fruit for dessert. And that's enough for me.


Ingredients:
  • 2 cups dark chocolate chips
  • 2 bananas
  • Peanut butter

Directions:


Peel bananas and thinly slice into pieces.


Spread a small spoonful of peanut butter between banana slices.


Melt the chocolate chips in a double boiler or in a microwave. Dip banana and peanut butter pieces into the chocolate and place on wax paper.


Place banana bites into the freezer for 30 minutes to an hour.


Make sure you add a lot of peanut butter. About now is when I started regretting being so conservative.


Enjoy!


Love and eating right,


Oreo bark


So, I made what some people would consider to be a "mistake." I told my husband, "Oh, babe, I love you soooo much that I'm' going to make treats for all your co-workers! It's going to be awesome and they're going to love you and love me and it will be fabulous." Then I casually asked how many co-workers he had.

"18."

That is a LOT of baking. And time. And money. So I decided to fill a few large $1 Christmas plates up with mostly no-bake goodies for those fabulous folks at the church. I also decided to be selfish. See, I don't do anything mint-chocolate. Nothing. That's blasphemy, to taint the flavor of my beloved chocolate with anything other than peanut butter.

Who does that? This is a rhetorical question since I realize I am the 1% of the world that hates this combo. Moving on.

This is such a cool recipe, and as someone who is not a fan of white chocolate, I can say this is delicious. So give it a try.

Ingredients:

  • 2 bags white chocolate chips
  • 18 regular Oreos
Directions:
  • Melt the chocolate chips in a double broiler on a very low heat, stirring constantly until completely melted.
  • Pour chocolate into a bowl and let sit for 5 minutes to cool.
  • Crush 15 of the Oreos in a large ziploc bag and add to the chocolate. Mix well with a wooden spoon.
  • Place a piece of wax paper in a shallow baking pan and pour chocolate/Oreo mixture in it. Using a spoon, spread evenly.
  • Crush the remaining 3 Oreos and sprinkle on top of the mixture.
  • Refrigerate for about 20 minutes or until very hard.
  • Lift hardened Oreo mixture by lifting the wax paper out of the pan and placing on the counter.
  • Use a knife (carefully) and break up bark.
  • Remove the actual chunks and dispose of all the crumbs. Yes, you may eat them off the counter. No one is watching.

To answer your question, yes, your counters will be a mess. And it will even get on the floor. But it will be worth it when you see...well, hear about...the looks on your husband's co-workers' faces.

It might not be worth the thirdhand experience for me, but it will be worth it for you.

Love and no-bake,
Rachael

Caramel Sauce


If I'm being completely honest, I've always had a biased opinion concerning caramel. I envision those gross hard-as-a-rock candies that people give you in gift bags. They're nasty. They're old. They're not anything I'm interested in making or eating.

Turns out you just have to wait for the right caramel to come along.

I have to admit that I've been holding out on sharing this recipe with you all for awhile. It's almost like I needed to keep it hidden in my heart; my own special miracle. But I decided it was against the Christmas spirit, and I am so for the Christmas spirit.

Fa-lah-lah-lah-lah....lah-lah, lah, laaaaaaaaaaaah.

So don't make me regret giving this to you, because it's insane. And incredible. And flawless. And I can drink it like soup. But please don't tell my health-nut husband that. He'll judge my lack of will power.

Ingredients:
  • 4 tablespoons of butter
  • 1 1/3 cups packed brown sugar
  • 1/2 cup heavy cream
  • 1/4 tablespoon of salt
Directions:
  • This is going to be easy. Throw it all in a pot on the stove. Turn the heat on medium low (about a 6-scale). Whisk gently until ingredients are melted and combined (about 10 minutes if the butter was cold, or you can shred the butter to moves things along a little quicker).
  • Transfer the caramel to a sealable container and put it in the fridge to cool.
  • Stir well and top anything and everything with it. And lick the spoon a few times. Life is short, after all.
Honestly, this is so good that I've considered making large batches, filling up mason jars with it and giving them away as Christmas gifts to friends. Anyone would love this. Anyone.

Love and my best kept secret,
Rachael


NY Times' World's Best Chocolate Chip Cookies


I didn't say it. The NY Times did. Apparently, this is the best recipe in the world for chocolate chip cookies. And if I may say so, they are pretty darn delicious. The texture is chewy, but has a little bit of a crunch to it. And the chocolate, well...I think the fact that it calls for over a pound of chocolate speaks for itself.

Get ready. Get your milk. GO!

Ingredients:
  • 2 cups minus 2 tablespoons cake flour
  • 1 2/3 cups bread flour
  • 1 1/4 teaspoons baking soda
  • 1 1/2 teaspoons baking powder
  • 1 1/2 teaspoons coarse salt
  • 2 1/2 sticks (1 1/4 cups) unsalted butter
  • 1 1/4 cups (10 ounces) light brown sugar
  • 1 cup plus 2 tablespoons (8 ounces) granulated sugar
  • 2 large eggs
  • 2 teaspoons natural vanilla extract
  • 1 1/4 pounds chopped bittersweet chocolate
  • Sea salt

Directions:
  • Sift flours, baking soda, baking powder and salt into a bowl. Set aside.
  • Using a mixer fitted with paddle attachment, cream butter and sugars together until very light, about 5 minutes. Add eggs, one at a time, mixing well after each addition. Stir in the vanilla. Reduce speed to low, add dry ingredients and mix until just combined, 5 to 10 seconds. Drop chocolate pieces in and incorporate them without breaking them. Press plastic wrap against dough and refrigerate for 24 to 36 hours. Dough may be used in batches, and can be refrigerated for up to 72 hours.
  • When ready to bake, preheat oven to 350 degrees. Line a baking sheet with parchment paper or a nonstick baking mat. Set aside.
  • Scoop 6 3 1/2-ounce mounds of dough (the size of generous golf balls) onto baking sheet, making sure to turn horizontally any chocolate pieces that are poking up; it will make for a more attractive cookie. Sprinkle lightly with sea salt and bake until golden brown but still soft, 18 to 20 minutes. Transfer sheet to a wire rack for 10 minutes, then slip cookies onto another rack to cool a bit more. Repeat with remaining dough, or reserve dough, refrigerated, for baking remaining batches the next day. Eat warm, with a big napkin.

So my husband just got home from Africa about an hour ago, and he's already had four of these. Maybe it's because he's only eaten rice and fish for 10 days. Or maybe it's because they're the best cookies in the world. I guess we'll never know.

Love and making-the-best,
Rachael


Trix or Treat Spider Cookies


First, I’d like to beg for you not to read too closely into this post. I took a 2-hour nap this afternoon, and while it was amazing, I’m not “all here,” if you know what I mean. I’ll be the first to admit that I enjoy Halloween, and not for the reasons you might assume. Aside from all the controversy that surrounds this holiday, I love it because it reminds me that Thanksgiving is only a few weeks away, which then ushers in Christmas. And we all know that I’m obsessed with Christmas. Obsessed. You won’t be able to get rid of me, I’ll be blogging so much. I mourn as I put my tree away on Tim’s birthday. Which is June 7th.

Regardless.

My mom’s friend, Holly, made these adorable “spooky” cookies and sent the recipe along to me. It was originally posted on Bakerella’s site, which is absolutely fabulous and noteworthy. I’ll post the recipe exactly as it’s seen on her blog. Thanks again, Holly!

Ingredients:
                  1 package Betty Crocker Double Chocolate Chunk Cookie Mix
                  1 can of chocolate ready-made frosting
                  1 can of vanilla ready-made frosting
                           24-48 Trix orange and green sweetened corn puffs
                           Toothpicks
Re-sealable plastic bags

Directions:
                  Preheat oven to 350 degrees.
                  Mix ingredients for cookies as directed on the package.
                  Use a small ice cream scoop to get similar sized cookies or just use a spoon and vary the amount for different size cookies.
                  Place cookie dough on a parchment covered baking sheet.
                  Bake for about 7-8 minutes.
                  Cool completely on a wire rack.
                  Makes about two dozen cookies.

To decorate:
                  Spread chocolate frosting on the top of each cookie.
                  Fill a re-sealable plastic bag with a couple of heaping spoonfuls of frosting and snip a tiny hole out of the bottom of one corner.
                  Pipe on three circles of white frosting for each cookie. Start in the middle with the smallest circle and work your way out.
                  Take a toothpick and beginning in the center, drag it lightly through each circle. Repeat all the way around the cookie.
                  Take remaining frosting and separate it into two bowls. Tint one frosting with orange icing color and the other with green.
                  Fill two re-sealable bags with the orange and green frosting and snip off the corner of each.
                  Pipe eight small legs with each color and place a matching orange or green Trix Cereal puff on the top of each pair of legs. Add one or several spiders on each cookie.
How cute are these? I hope you all have an amazing Halloween, or harvest festival, or whatever you celebrate! Just as long as there are pumpkins, cookies and fall involved, I’m down for whatever you want to call it.

Love and the spook,
Rachael


Apple Pie with Crumb Topping


Today is the first perfect fall day we've had all year, and let me tell you what...here in South Carolina, we deserve a perfect fall day. I've said this time and time before, but I will never adjust to the heat and humidity that comes with southern summers. Same with my hair. So you'd think I would be spending this perfect day wearing a jean jacket and wandering around some apple orchard, but I've settled for re-runs of the Housewives of Atlanta. I did, however, make up for my lack of fall spirit with this pie.

That's where I'm at in life.

Ingredients (for pie):

  • 1 pie crust
  • 4-5 Granny Smith apples
  • 1/2 cup sugar
  • 3 tablespoons flour
  • 1/4 cup water
  • 1/2 cup white sugar
  • 1/2 cup packed brown sugar
  • 1 teaspoon cinnamon
  • 1/2 teaspoon nutmeg
Ingredients (for topping):
  • 1/2 cup packed brown sugar
  • 1 stick butter
  • 1 cup flour
Directions (for pie):
  • Peel, cut and core apples. Place in pie crust.
  • In a medium sauce pan, melt butter.
  • Add the rest of the pie ingredients and stir. Bring to a boil.
  • Pour filling evenly over apples in pie crust.
Directions (for topping):
  • In a medium bowl-and using hands-combine all three ingredients until it's a nice, crumbly mixture.
  • Top pies generously with crumb topping.
  • Bake at 350 for 35-40 minutes until crumble topping is golden brown.
  • Serve with vanilla ice cream.
It's really much simpler than it looks at first glance, especially if you buy store-bought crust. Serve warm with cinnamon ice cream and enjoy!

Love and fall...finally,
Rachael

6 Layer Smith Landing Cake

Believe it or not, I'm not really into cake; however, I know many individuals who are dedicated "cake people." I created this cake based off of two recipes I found: one from Saveur, and one from Group Recipes. The moment I saw it, I just knew. You know that feeling? Love at first sight, some might call it. This was more than that. I felt converted to the cause of cake, as I like to refer to it as. I think what was most interesting (and tasty) about this was the way that the recipe called for the boxed yellow cake to be doctored. I will forever and always make my boxed yellow cakes this way.

Ingredients:
  • 8 large Reese's cups, frozen
  • Nonstick cooking spray
  • Flour
  • 1 box yellow cake mix
  • 2 1/2 cups evaporated milk
  • 16 tbsp butter
  • 1 tsp vanilla extract
  • 1/2 teaspoon salt
  • 4 eggs
  • 6 cups confectioners' sugar
  • 1/4 cup cocoa
Directions:
  • Throw the Reese's in the freezer the night before you make this cake.
  • Heat the oven to 350 degrees. Spray as many 8" round cake pans as you have with cooking spray, then dust with some flour and knock out the excess. Set aside.
  • Put the cake mix, 1 1/2 cups evaporated milk, half the butter, vanilla, salt, eggs and 1/3 cup water into a large bow.
  • Beat until light and fluffy
  • Add 1 cup of batter to each cake pan and bake 10-12 minutes or until cake is golden brown and thoroughly cooked
  • Continue this process until batter is gone
  • Combine the remaining milk, sugar and cocoa in a medium pot; stir well, then add remaining butter.
  • Cook over medium heat, stirring constantly, until butter is melted, which normally takes 4-5 minutes. Let cool for 5 minutes, continuing to stir well
  • Spread each cake layer with about 1/2 cup of frosting until all your layers are completed. Frost the outside of the cake with remaining frosting
  • Take the Reese's cups out of the freezer, remove packaging and put in ziplock baggy. Using a tenderizer, hammer, or the fists God gave you, smash them into little pieces
  • Top cake with Reese's crumbs and refrigerate until ready to serve
This cake is peculiar in that Smith Landing cakes are normally 10 layers, and I only did 6. I did this for  two reasons: 1) I was sick and tired of baking, and 2) the original recipe lied and said I would only need 1 box of cake mix, when you actually need 2. So if you feel like going the distance and doing the whole 10 layers, then double all the cake/frosting ingredients. I know you can do it.

Love and waaaaaaay-too-much-cake,
Rachael

No-Bake Chocolate, Peanut Butter and Oatmeal Cookies


We all have our days. I have more than most people. Or maybe I convince myself of that so I'm justified in baking creating these as often as possible. My mother actually introduced these to me, which is no surprise. She is the queen of effortless and fabulous, but I have to admit, I was skeptical. I'm one of those people who ashamedly believes that the harder you work and the more expensive the ingredients, the better the food will taste. While that's true in some cases, this is not one of them. So next time you have a day, forget baking. Just make these.

P.S. I've heard these can also be called cow patties, but I wouldn't advice googling that. It'll significantly decrease your appetite.

Ingredients:
  • 3 1/2 cups oats, divided
  • 2 teaspoons vanilla
  • 1/2 cup milk
  • 1 stick butter
  • 1/2 cup peanut butter
  • 2 cups of sugar
  • 4 tablespoons of cocoa
Directions:
  • Before starting, lay out a few pieces of wax paper on your counter. And ask God to forgive you for the calories you are about to consume. Maybe pray twice.
  • In a large pan, melt butter slowly.
  • Once the butter is melted (but not sizzling), add the milk, sugar and cocoa. Lightly stir.
  • Turn up the heat and bring mixture to a rolling boil. 
  • Remove from the heat once it's boiling and add the peanut butter and vanilla. Combine.
  • Add the oats. Mix that in, too.
    • P.S. Use a wooden spoon. You don't want to know the fate of my plastic spatula.
  • Using a tablespoon, drop spoonfuls onto wax paper.
  • Let cookies cool until they are set. To speed up the process, place cookies in the fridge or freezer.
    • Side note: my mom dropped off some of these when she was in town and threw them in my freezer for an "emergency." I forgot about them, and about 6 weeks later had a minor chocolate-emergency. Guess what? They were still perfect.
In the words of Rachel Zoe, "These.are.everything."

Love and cheap thrills,
Rachael

Walnut Chocolate Chip Cookies

Never in a million years did I think I'd ever make a cookie with nuts in it. I just don't do that. It's similar to my belief that vegetables don't belong on pizzas. I get that it's classy and chic, but there's no room for that in my kitchen.

Regardless.

I left the Seneca Journal a little over a week ago, and my farewell gift to my boss was his favorite type of cookie. They just happened to be the thing I would probably never make. God works in mysterious ways.

Ingredients:
  • 2 1/4 cups all-purpose flour
  • 1/2 cup granulated sugar
  • 2 sticks butter, room temperature
  • 1 cup packed brown sugar
  • 1 teaspoon salt
  • 1/2 teaspoon baking soda
  • 2 teaspoons pure vanilla extract
    • Use a full teaspoon. When making cookies, this is not the ingredient to skimp on. And buy the real stuff if you can afford it.
  • 2 large eggs
  • 1 bag of chocolate chips
  • 3/4 cup walnut chunks
    • If you only have whole walnuts, throw them in a zip lock bag, get all the air out, and smash 'em. Just improvise.
Directions:
  • Combine flour and baking soda in a small bowl and set aside
  • Combine brown sugar, granulated sugar and butter. Beat with a mixer until fluffy and fabulous.
  • Add the salt and vanilla and combine
  • Add eggs one at a time and mix at a lower speed on the mixer
  • Throw in the flour in small quantities, continuing mixing on a lower speed. Continue until totally combined
  • Stir in walnut pieces and chocolate chips
  • Heat oven to 350 degrees. Bake for 8-10 minutes. Let cool on pan for 10 minutes before transferring them to a serving dish or plate.
    • Don't overcook them! If you take them out and they look perfect, that means they're probably overdone. If you take them out and they look 2-3 minutes underdone, they'll be perfect once you let them sit. The goal is to make them chewy, and they continue to cook on the hot baking sheet even after they're out of the oven. That's why it's important to let them sit for awhile before eating them.
Love and stepping-out-of-the-box,
Rachael

Angel food cake

If I'm being honest, there are few things I actually enjoy about summer. I've learned that I will never adjust to east coast heat and humidity, and it isn't exactly enjoyable sitting in a cubicle all day, knowing that all the college students of the world are tanning and working in frozen yogurt shops. I'm bitter and unprepared for adulthood.

Regardless, one thing I absolutely love about summer is the fresh produce. Everything is greener, everything is fresher, and it's all just plain yummy. I was spoiled growing up in California where the fruits and veggies are the highest quality (it's a fact, people), and I always loved getting strawberries. My mom doesn't care much for them, but my dad always loved them.

Needless to say, with this heat and the stress of living away from my husband for a few weeks, we definitely needed to indulge in some dessert. So I needed to find something that wouldn't ruin our flawless bikini bodies (fiction, not fact). Angel food cake is made up of lots of egg whites, which cuts the calories tremendously. There's actually under 150 calories in a typical piece of angel food cake. Throw on some fresh strawberries and whipped cream (which is also low in calories), and you have yourself a fresh, low-calorie summer treat.

Enjoy!

Ingredients:
  • 1 cup sifted cake flour 
  • 1/2 cup sifted sugar 
  • 1 1/4 cups (10-12) egg whites (room temperature) 
  • 1 1/4 tsp. cream of tartar 
  • 1/4 tsp. salt 
  • 1 tsp. vanilla extract 
  • 1/4 tsp. almond extract 
  • 1 cup sifted sugar
Directions:
  • Sift 1 cup flour and 1/2 cup sugar together 3 times.
  • Place egg whites in a large mixing bowl. Beat on high speed until all egg whites are foamy. Add cream of tartar, salt, vanilla extract and almond extract.
  • Beat egg whites until they're stiff, but not dry. This can take awhile, so be patient.
    • You should definitely use a hand mixture for this. If you use a spoon, you will be doing this for a very long time.
  • Add sugar, small amounts at a time, while continuing to beat on high speed.
  • Sift flour/sugar mixture over egg white mixture about 1/4 cup at a time.
  • Fold in gently but thoroughly using a spatula after each addition.
    • Do not mix, and please be gentle! If you are rough with the egg white mixture, it will mess with the structure, which is what gives the cake it's fluffy "angel-ness." Is that a word? 
  • Pour batter into an ungreased angel food cake pan
  • Bake in a preheated 350°F oven for 40-45 minutes. 
    • Make sure your oven is preheated, otherwise it will mess with the cooking time. Also, make sure that you have plenty of room above the cake pan, because it will rise. I had to carve off the top of my cake because it rose so high that it was touching the top of the oven. Learn from me, lovelies!  
  • Cool cake in pan for 1 hour upside down, or until completely cold before removing the cake. Insert a dull knife along sides to free cake if cake is still attached after cooling.
So there ya' go! This cake is airy and light and flawless.

Love and the bright side of summer,
Rachael

Cupcakes in a jar

I have to admit, I've been avoiding the baking aisle for quite some time now. I find that desserts are one area where I can exhibit very little control. But the time has come, my lovelies, to revisit my old, dear friend: the cupcake.

For the two of you who haven't been updated, my husband, Tim, has received a new job in Greenville, so he just left his position at Foothills Community Church. Being the homemaker I am (*giggle*sigh*self-realization*shame*back to blogging*), I knew that I should make something for the wonderful staff over at FCC. They have, after all, been so great to both of us and are being incredibly supportive during this transition. So after tossing around seven or eight ideas, my mother came to the rescue.

What else is new?

It's like we're on the same wave length. We call each other at the same time, send each other emails at the same time, and the moment I desperately need a good dessert recipe, there she is. Apparently, these aren't new, but I am in love. I love mason jars, and I love the idea of putting sweets into personalized containers. In my home, if they weren't personalized, there was a good chance someone else would eat your share.

All's fair in love and dessert, right?

Anyway, these can be made with any variety of cupcake recipes. I am doing two types: french vanilla cake with creamy chocolate frosting, and strawberry cupcakes with cream cheese frosting. Both winners in my book. Just be creative and have fun with these!

P.S. Not to diminish the love and sincerity of these gifts, but for those of you who are unaware of this, mason jars are extremely inexpensive when bought at WalMart. I got a 12 pack for $6. Just sayin'.

This is important! Normally when you make cupcakes, you fill them 3/4 of the way full. If you do that with these, they'll be too high for the jar, so go ahead and fill them only 1/2 of the way. I'd also suggest not using the paper containers and just putting the dough straight in the cupcake baking pan, well-greased.

French vanilla cupcakes
Ingredients:
  • 2 sticks unsalted butter
  •  2 cups sugar
  • 1 large egg
  • 2 egg yolks
  • 3 cups flour
  • 1 teaspoon baking powder
  • 1 teaspoon baking soda
  • 1 cup of buttermilk, room temperature
  • Pinch of salt
  • 2 teaspoons vanilla extract
  • 1-inch of vanilla bean
Directions:
  • Preheat oven to 350 degrees
  • Throw the buttermilk in a small pan over the stove and heat until warm
  • Remove from the heat and add the vanilla pod. Set aside.
  • Beat the butter and sugar until well-combined and fluffy. You know the drill.
  • Add the eggs and egg yolks, mixing after each one until well-combined.
  • Combine flour, baking powder, salt and baking soda in a separate bowl.
  • Cut open the vanilla pod and scrape the seeds into the buttermilk. 
    • If you want, you can always save the outside pod for vanilla sugar later on.
  • Add 1/3 of the flour mixture until well-combined.
    • Continue adding the flour mixture slowly.
  • Spray the cupcake pan very well, scoop the batter in and bake for 18-20 minutes
  • Cool before frosting.
Creamy chocolate frosting
Ingredients:
  • 2 3/4 cups confectioners' sugar
  • 6 tablespoons unsweetened cocoa powder
  • 6 tablespoons unsalted butter
  • 5 tablespoons evaporated milk
  • 1 teaspoon vanilla extract
Directions:
  • Sift the confectioners' sugar and cocoa together and set aside
  • Mix butter until smooth
  • Beat in sugar mixture
  • Add evaporated milk 
  • Blend in vanilla
  • Mix until light and fluffy.
    • If you need to, you can adjust the mixture and add more milk or sugar, depending on how the consistency turned out. Mine turned out wonderfully, though, just as this recipe is written  

 Strawberry cupcakes
Ingredients:
  • 1 package(s) (18 1/4-oz.) cake mix, plain white or yellow
  • 1 package(s) (3-oz.) strawberry gelatin
  • 1 cup(s) (finely chopped fresh) strawberries, with juice (from 1 1/2 cups whole berries)
  • 3/4 cup(s) milk
  • 3/4 cup(s) vegetable oil
  • 4 large eggs
Directions:
  • Combine the cake mix, gelatin, strawberries and juice, milk, oil and eggs in a large mixing bowl. Blend with an electric mixer on low speed until combined.
  • Spoon into cupcake baking pan
  • Bake 20 to 25 minutes. Let cool for 15 minutes

Cream cheese frosting

Love you guys, but I'm not typing it all out again. Check out my previous blog that covers this recipe.


Getting everything in the jar

This is really quite simple, and you can be creative with this. I've decided on these simple layering steps:
  • Cupcake
  • Frosting/sprinkles
  • Cupcake
  • Frosting/sprinkles 
    • Here's a warning: Do NOT use whipped cream as the top layer. I thought this would be a brilliant idea; however, it turns out whipped cream doesn't last more than about 20 minutes. Just splurge and make more frosting.
That's it. Super simple, tasty and fun to make. And if we're being honest, they're pretty cheap.

Another thing: we don't judge people here on this blog. If you don't have time to make these from scratch — as I know most of you don't — no one will be able to tell if you just grab the box mix. It also cuts down on the cost.

I won't tell.

Love and everything-tastes-better-in-a-jar,
Rachael


Grandma's Carrot Cake


I love Easter. Jesus came to earth, died on the cross and rose again, saving us from our sins and providing us with a way to live eternally with Him. That's why I love Easter.

But there's something else.


Tim's a youth pastor, right? That means that Easter is his 2nd busiest day of the year next to Christmas Eve. Since it's difficult for us to travel anywhere on these days, it means that I have control. Yes, I am a control freak by nature, and I've learned not to apologize for it. I'm naturally more like Monica in Friends — I want to be the host. This is one of very few days of the year where family comes to us, and I get to have complete control over the menu.

Let's put it this way: God didn't put me in politics for a reason. Too much power goes to my head.

So I'm going to post what my spread will be this Easter. First and foremost, let's start with dessert. That's the way to do it, right? While there are thousands of options out there, I'm going to stick with a classic: my grandma's carrot cake.


Now let me explain something. My grandma is anything but normal. And neither is this cake. See, Grandma has the world fooled. She grew up in a very conservative environment (nothing wrong with that), so you might naturally assume that she's a quiet, timid woman. That's hardly the truth. She's got a wild streak that I feel fortunate to have witnessed on many occasions. One time she paid me $20 to keep my mouth shut about some of her antics. So I won't talk about it. But I'm just sayin', my nickname for her is "sexy." That should give you a clue or two.


Cake Ingredients:
  • 3 cups sifted flour (sifted twice)
  • 2 cups sugar
  • 3 tsp. baking powder
  • 2 tsp. baking soda
  • 2 tsp. cinnamon
  • 1 tsp. salt
  • 1/2 tsp. vanilla extract
  • 2 cups grated or shredded carrots
  • 4 eggs well beaten
  • 1 1/3 cups vegetable oil
  • 1/2 cup chopped nuts


Frosting Ingredients:
  • 1 eight oz. block of cream cheese
  • 1/2 cup butter
  • 1 tsp. vanilla
  • 1 box of powdered sugar


Directions:


First, crack the eggs and pour the oil into a large bowl (preferably a stand mixer). Mix well.


Slowly add sugar, combining.


Add vanilla. Mix well.


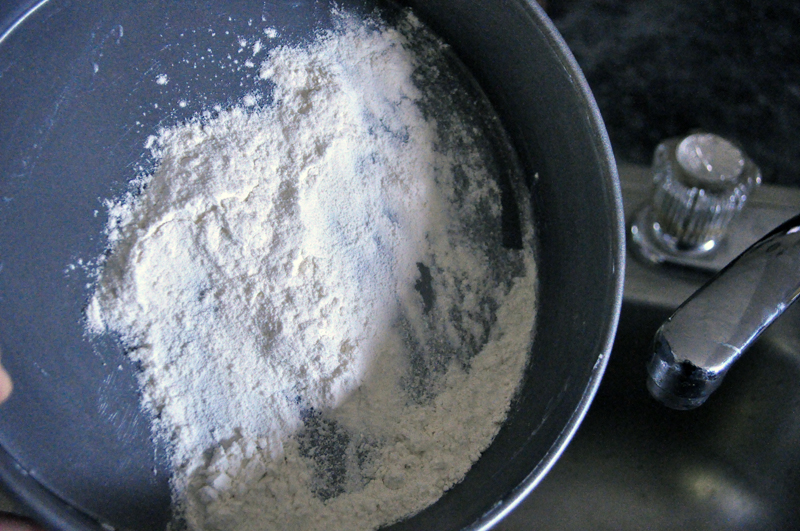
Add flour in small increments, mixing continually.


Add baking powder.


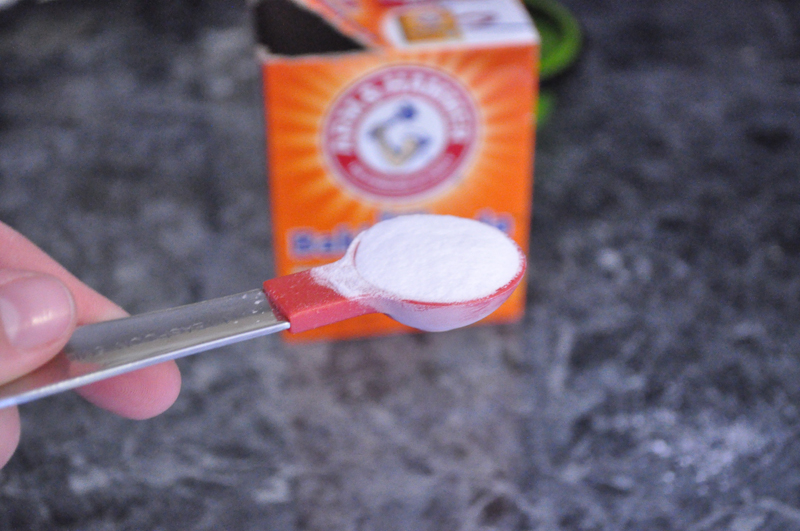
Then the baking soda.


And finally, the salt.


Throw in the cinnamon. Mix well.


Grab a handful of nuts. Some people use only pecans, but I chose to use mixed nuts.


Using a food processor or something similar, chop up the nuts.


Combine nuts into dough mixture.


These are the carrots I used. Pre-shredded.


Toss the carrot shreds in to the food processor.


Chop 'em up and throw 'em into the dough mixture. Combine.


Next we're going to flour the cake pans. I used 2 8" round cake pans. Cover the inside of each pan with butter.


Dust with some extra flour, dumping out the excess.


Pour the dough into the pans.


Bake at 350 degrees F for about one hour, or until cooked thoroughly. You can test this by putting a toothpick in the middle of the cake, and if it comes out clean, the cake is done.


Allow to cool for about 20 minutes, then remove from pan.


Very gently, using a bread knife, cut the top off the cakes so that they are even.

Let's start on the frosting.


Beat together butter, cream cheese and vanilla.


Add powdered sugar and mix until well-combined.


Okay, let's start with the frosting. Place one of the halves on a cake stand.


Dump on some of the frosting.


Spread out evenly.


Top with second half of cake.


Scoop another large bit of frosting on top of the cake.


Spread out as evenly as possible, as thin as possible.


Spread out a second layer of frosting.


Using a damp paper towel, wipe down any crumbs or frosting smudges.


You can decorate this however you'd like. I like the whole carrot look.


Carrot cake=Easter classic.


Love and Grandma recipes,

-->
Content Copyright © 2009 by Rachael Wadsworth and All Kinds of Yumm. All rights reserved. Click here to read our Privacy Policy. Click here to read our Cookies Policy.